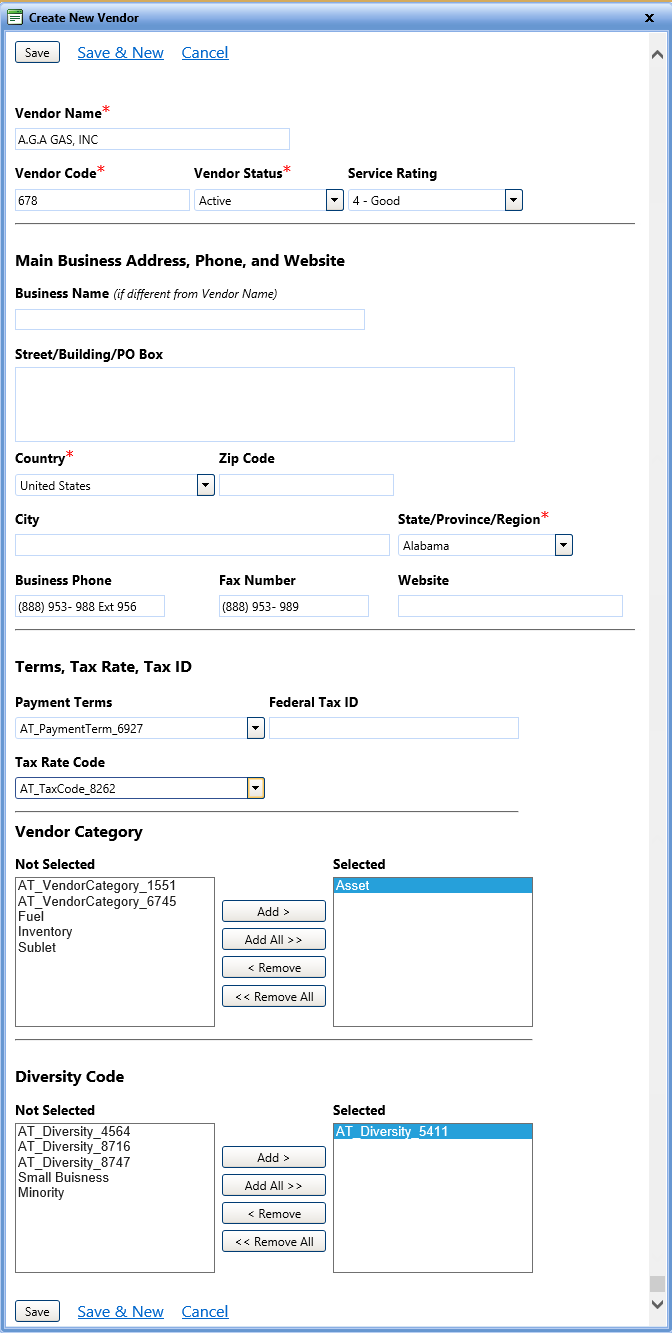
The Create New Vendor dialog box lets you add a vendor record in FASTER Web.
Create New Vendor
1. Click the Vendor module.
2. In the Actions section, click Create New Vendor.
The Create New Vendor dialog box opens.
3. In the Vendor Name box, type the name of the vendor.
4. In the Vendor Code box, type the identification code of the vendor.
5. In the Vendor Status list, select the status of the vendor.
The status of the vendor can be active or obsolete.
6. In the Country list, select the country of the vendor.
7. In the State/Province/Region list, select the state/province/region.
|
Note: You can also enter the following optional fields:
The selected Tax Rate Code will be the default value of Tax Code in the Inventory module > Ordering an Item > Adding the Order Details
To add all the vendor categories, click To remove vendor category, select the category in the Selected box and click To remove all the vendor categories, click · To add diversity code, select the diversity code in the Not selected box and click To add all the diversity codes, click To remove diversity code, select the diversity in the Selected box and click To remove all the diversity codes, click |
8. When finished, click one of the following:


